Introduction Link to heading
Firewalls are used in various networks to block access to certain content. College WiFi networks are known to block streaming websites like Netflix and game stores like Steam through Firewalls.
To bypass these restrictions, we can divert our internet traffic through a proxy server rather than letting it pass directly through the firewall. The firewall will consider that the internet traffic is going to the proxy server, not the website we are trying to access. Therefore, it won’t block the traffic.
This tutorial will show you how to bypass the firewall, send your internet traffic through a proxy server, and open banned websites. Azure for Students provides $100 credits if you log in with a student ID. Therefore, if you’re a student, you’d get this service for free. AWS also has a free tier for the 1st year of use.
Use Cases and Limitations Link to heading
- All browser-based traffic will go through the proxy server. It means all the websites banned on the firewall would be accessible through Mozilla Firefox. Google Chrome and Microsoft Edge do not allow us to select proxy servers unless we change some system settings (that can be a bit dangerous).
- To use any peer-to-peer services, such as torrent on the network, you must ensure that the server you rented has peer-to-peer connection enabled by the ISP. You can check this by trying to download a torrent using transmission-cli on your remote server.
- Installed applications directly connect to the internet instead of sending data through the proxy server. If these applications do not provide a setting for selecting a proxy server, their traffic will pass through the firewall.
Why not a VPN? Link to heading
Not using a VPN is not a choice but a compulsion. My college WiFi uses a Fortinet firewall which has blocked all the major VPNs (including OpenVPN). A proxy server allows me to easily bypass this firewall without the fear that one day this server will be blocked (they can’t find the IP address of my proxy server).
Also, as a student, you can get small servers for no cost from Azure or AWS. Azure Students subscription plans give you $100 credits on signup. If you manage these credits well, you can run your proxy server for a long time.
How it works Link to heading

The above diagram shows the simplest example of a Proxy Server. Your requests and internet traffic are sent to a single server, which requests the website on your behalf. The website sends the data back to the proxy server, which sends it back to you.
We will use a SOCKS5 proxy and send our data through an SSH tunnel. It is safer than HTTP or HTTPS proxy and is quite famous for bypassing firewalls.
Let’s get started Link to heading
Step 1: Get a server Link to heading
First, you need a server you can turn into a Proxy Server. It can be an already existing server you use for computing or a low-cost, basic-tier server rented from Azure, AWS, Linode or any other Cloud Computing service. In this example, I’ll show you how to create a server on Azure. Other services also have a similar process. You must ensure that you get a static IP Address. Follow the video below to create your server:

Make sure you download the key file. We will use it later to generate PuTTY’s ppk file.
You have now rented a server from Azure. Click the “Connect” button on top and select “SSH”. You will be redirected to the following page:
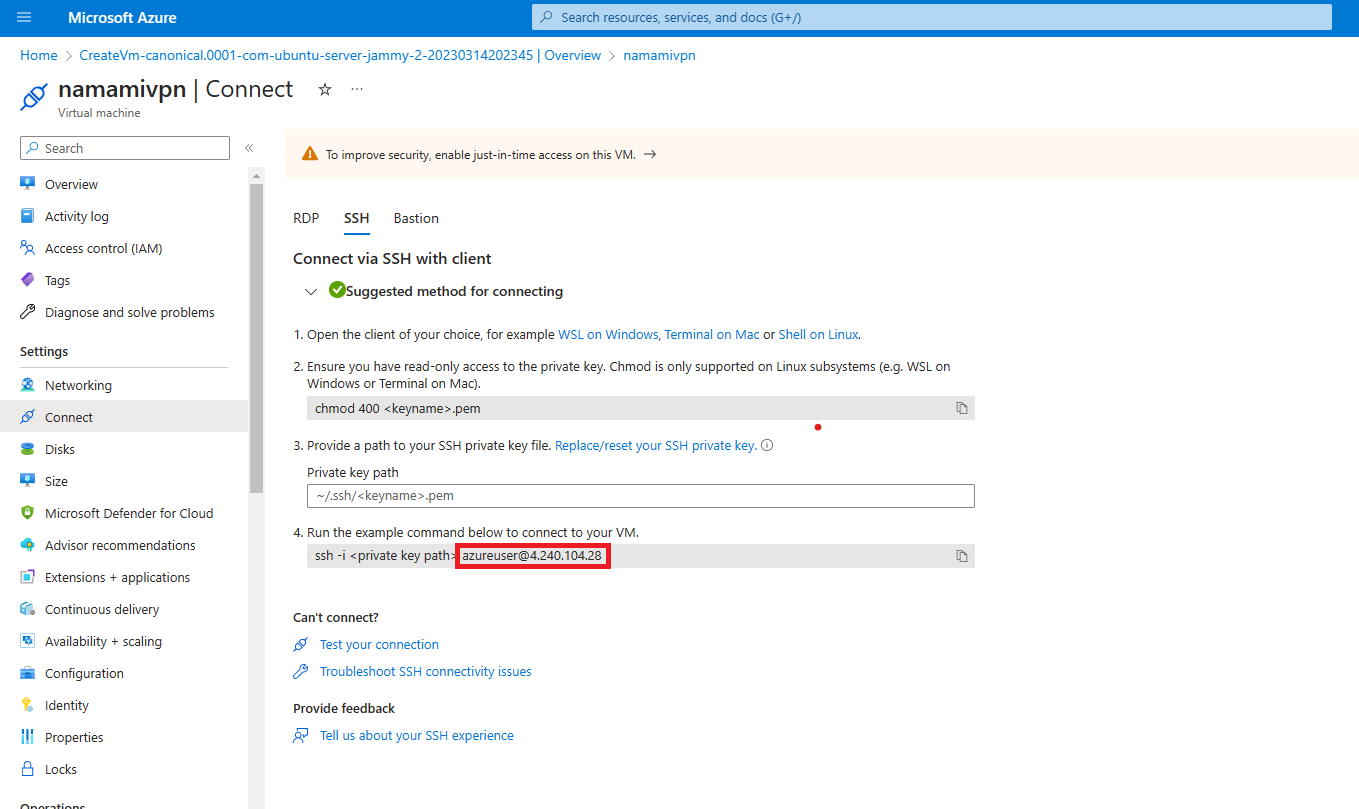
Note down your username and IP Address. We will use it now to create an SSH Tunnel.
Step 2: Create a Dynamic SSH Tunnel to your server Link to heading
Windows Link to heading
-
Download and install PuTTY on your system.
-
Now search for the installed software “PuTTYgen” and open it. It must have been installed along with PuTTY. Load your existing key file (We downloaded the key file when we created our server).
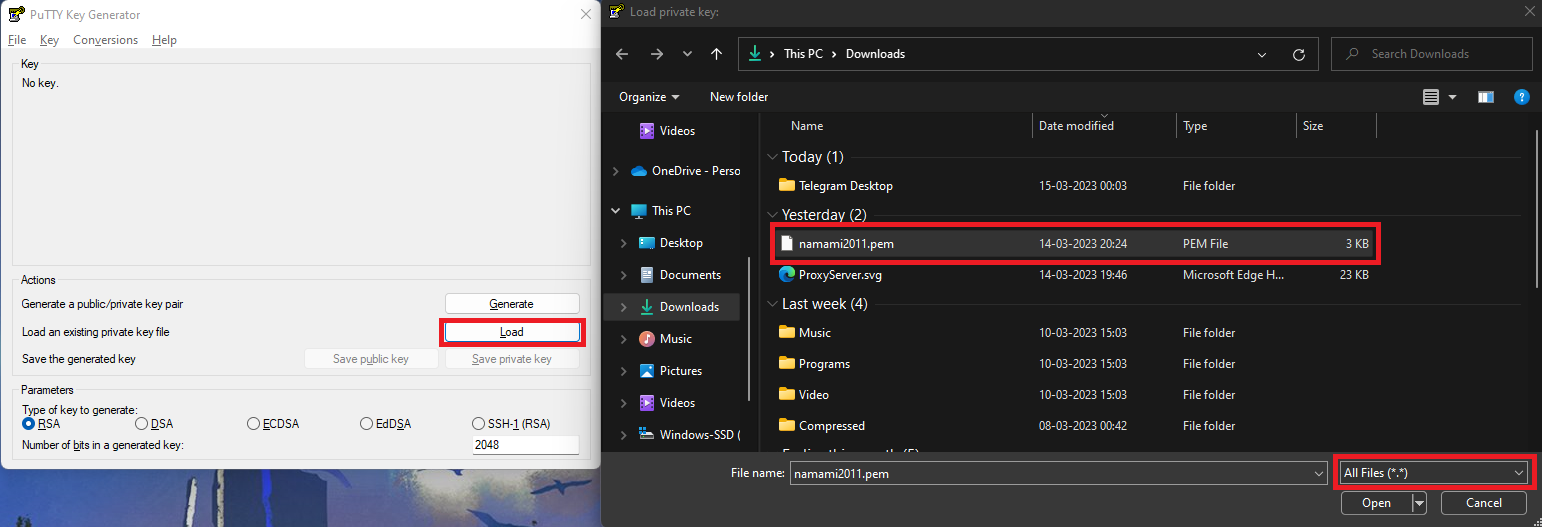
Now click “Save private key” and save it in a personal folder like “Documents”. This converts the downloaded pem key into a ppk file. Click “Yes” when PuTTYgen asks if you want to save it without a passphrase. You should not share this private key with anyone.
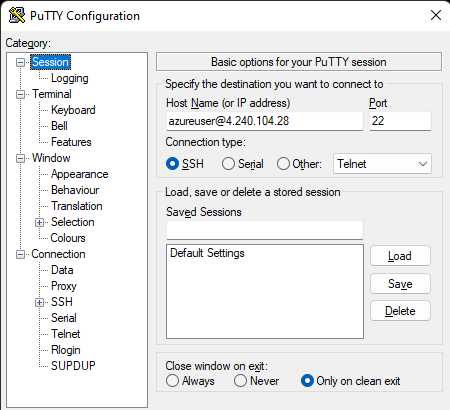
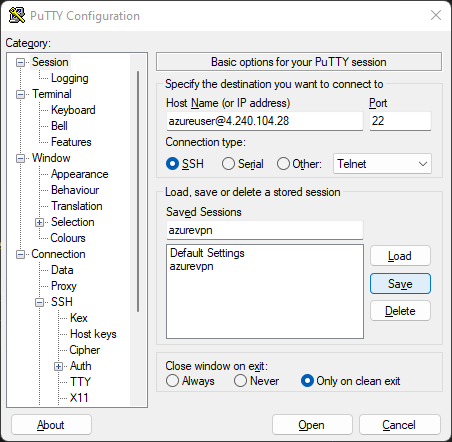
- Open PuTTY. On the left, you’ll be able to see various categories. Click on “Session”. In the “Host Name” text box, paste your server’s <username>@<ipaddress/domain>. It should look like:-
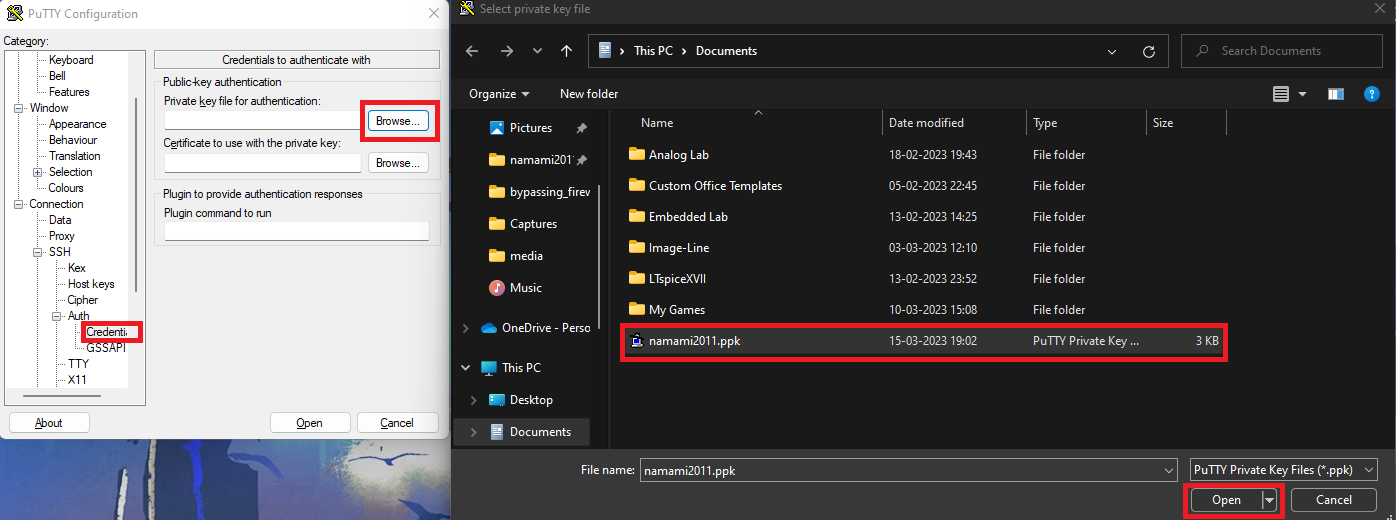
- Now go to Connection > SSH > Auth > Credentials in the left tree. In the “Private key file for authentication” field, click the “Browse” button and select the ppk key file we generated in step 2.
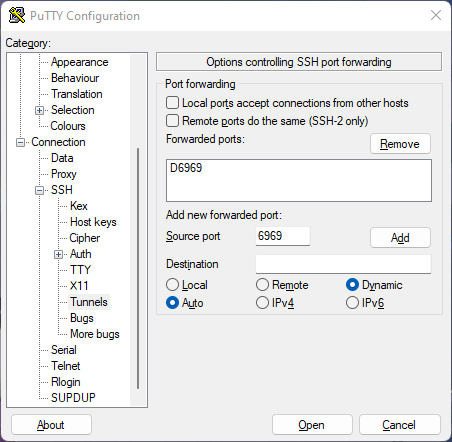
- Now go to Connection > SSH > Tunnels section and enter a “Source Port”. Ensure this port is currently free on your system, i.e. no application is using this port. Select “Dynamic” at the bottom and click “Add”. This setting will create a dynamic SSH tunnel from your chosen port to the Proxy Server.
- Go back to the “Session” section. Now we need to save these settings for future use. Type a session name in the “Saved Sessions” text box and click the “Save” button.
The next time you start PuTTY, you just need to select your Saved Session and click the “Load” button. All the settings configured in the above steps will be automatically filled.
- Click the “Open” button to start the SSH session. You will be greeted by a dialog box asking if you want to add this server to the list of Known Hosts. Select “yes”, and now you should be able to access your server through an empty terminal like the one below.
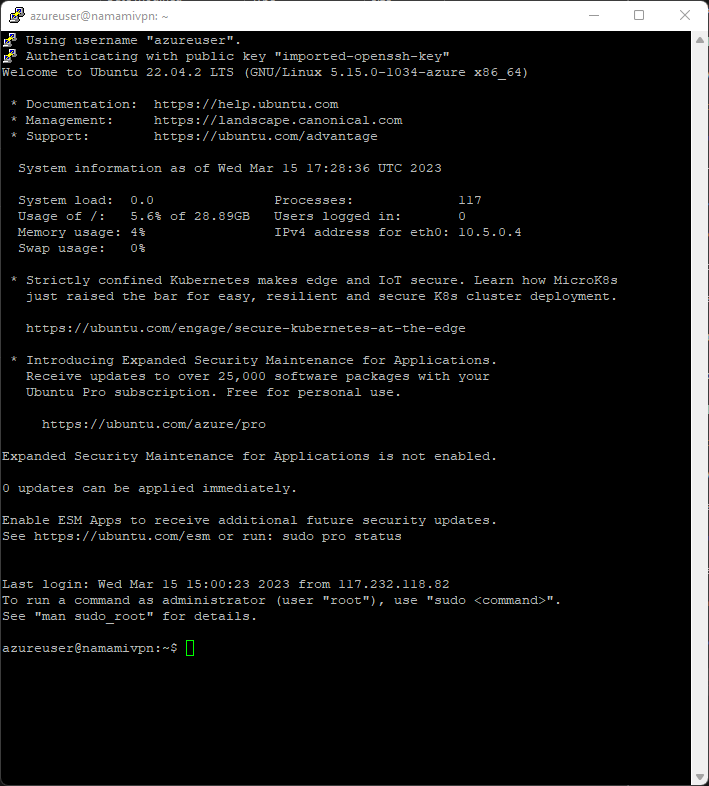
As long as this terminal is open and responding, your tunnel is active, and you can send internet traffic through it. If you want to close the connection, close this terminal window.
Linux and MacOS Link to heading
Creating a dynamic SSH tunnel is rather simple on Linux and MacOS. Just open your terminal and enter the following command:-
ssh i /path/to/key -D <local port> <username>@<ip/domain>
Fox example:-
ssh i ~/.ssh/namami2011.pem -D 6969 azureuser@4.240.104.28
Just make sure the port you give is free and no application is using it. Avoid ports 1 to 1024 as they are reserved for other applications. The dynamic SSH tunnel will be created and as long you keep the terminal open, you can connect to the proxy server.
Step 3: Download Mozilla Firefox and connect to the server Link to heading
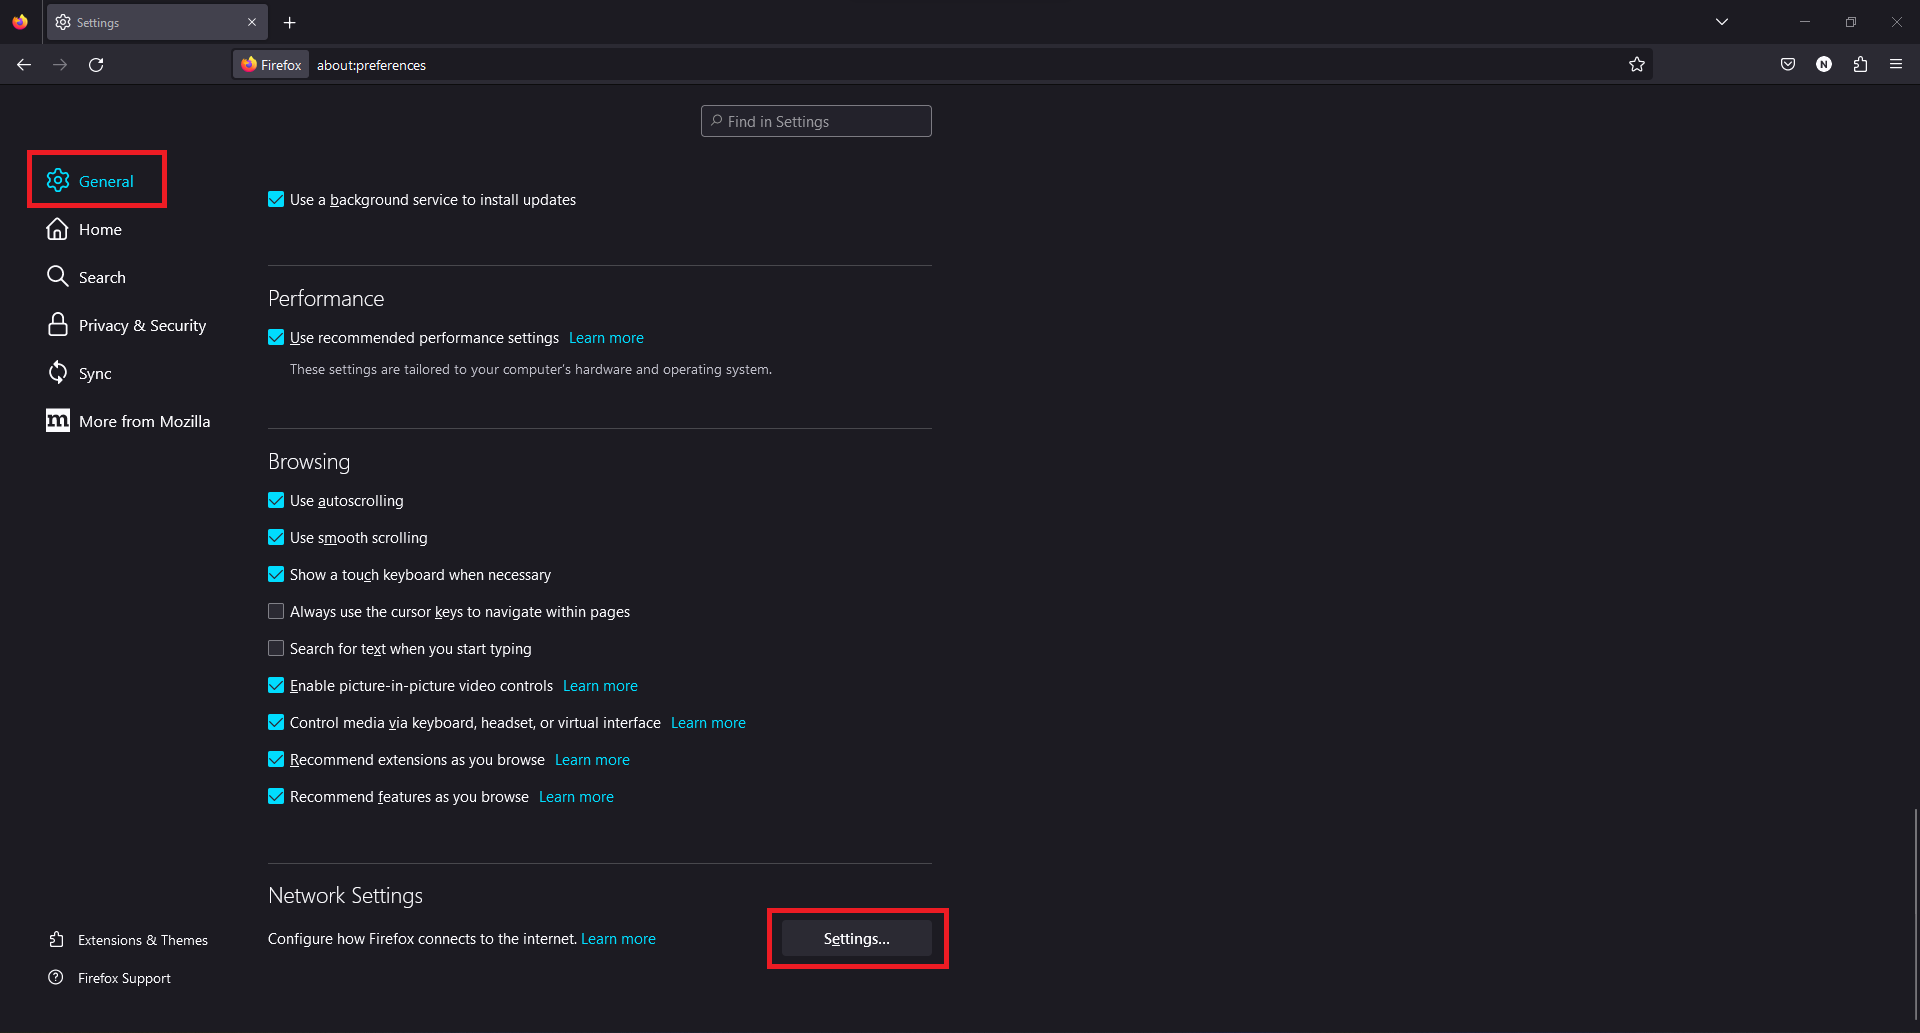
Mozilla Firefox offers important Proxy setings that chromium based browsers like Google Chrome, Edge, Brave do not provide. Install Firefox and go to its Settings. Scroll to the bottom of the “General” settings. In the “Networks Settings” section, click on the “Settings” button next to “Configure how Firefox connects to the internet”.
This will open the “Connection Settings” dialog box. Select “Manual proxy configuration” and enter “localhost” in the “SOCKS Host” and the tunnel port number in the “Port” section next to it. Also, make sure the “SOCKS v5” button is selected below.
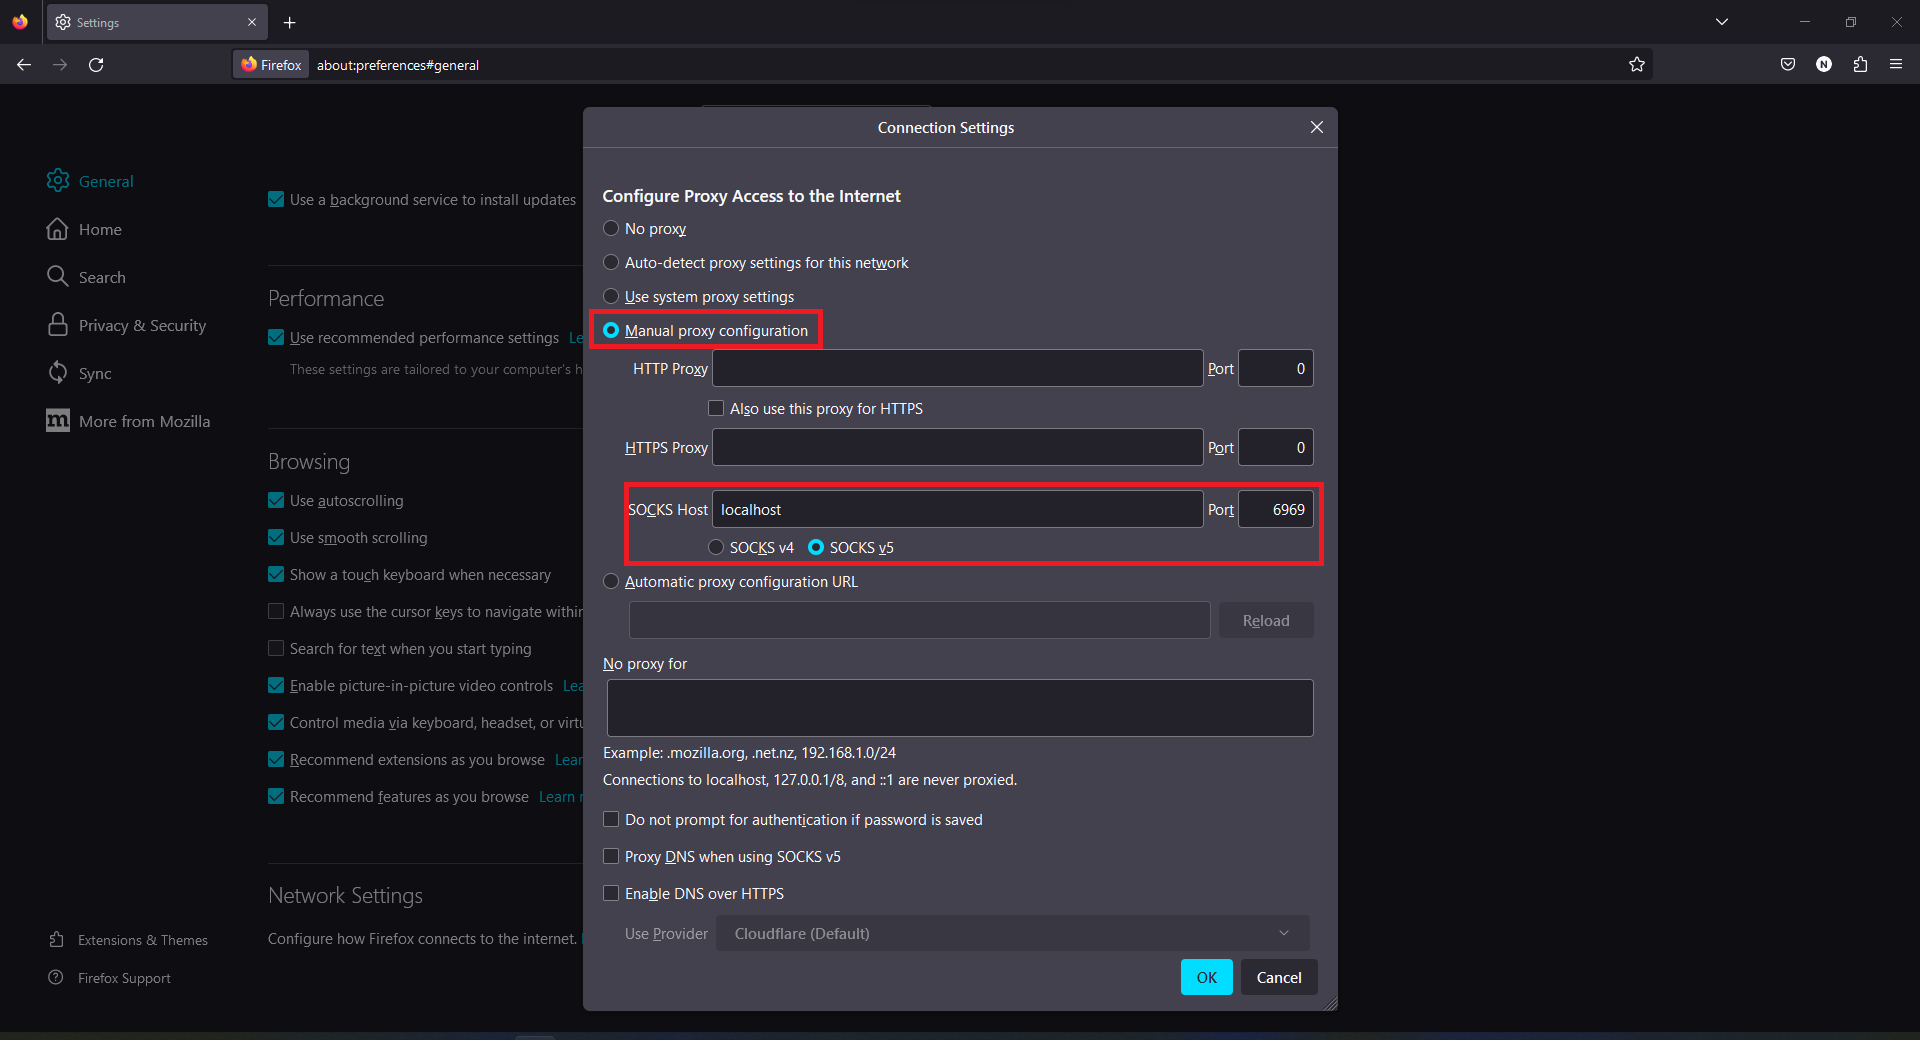
Click OK and now you are set.
Enjoy open internet Link to heading
You can now browse the internet freely without any fear of the firewall through your Firefox browser.
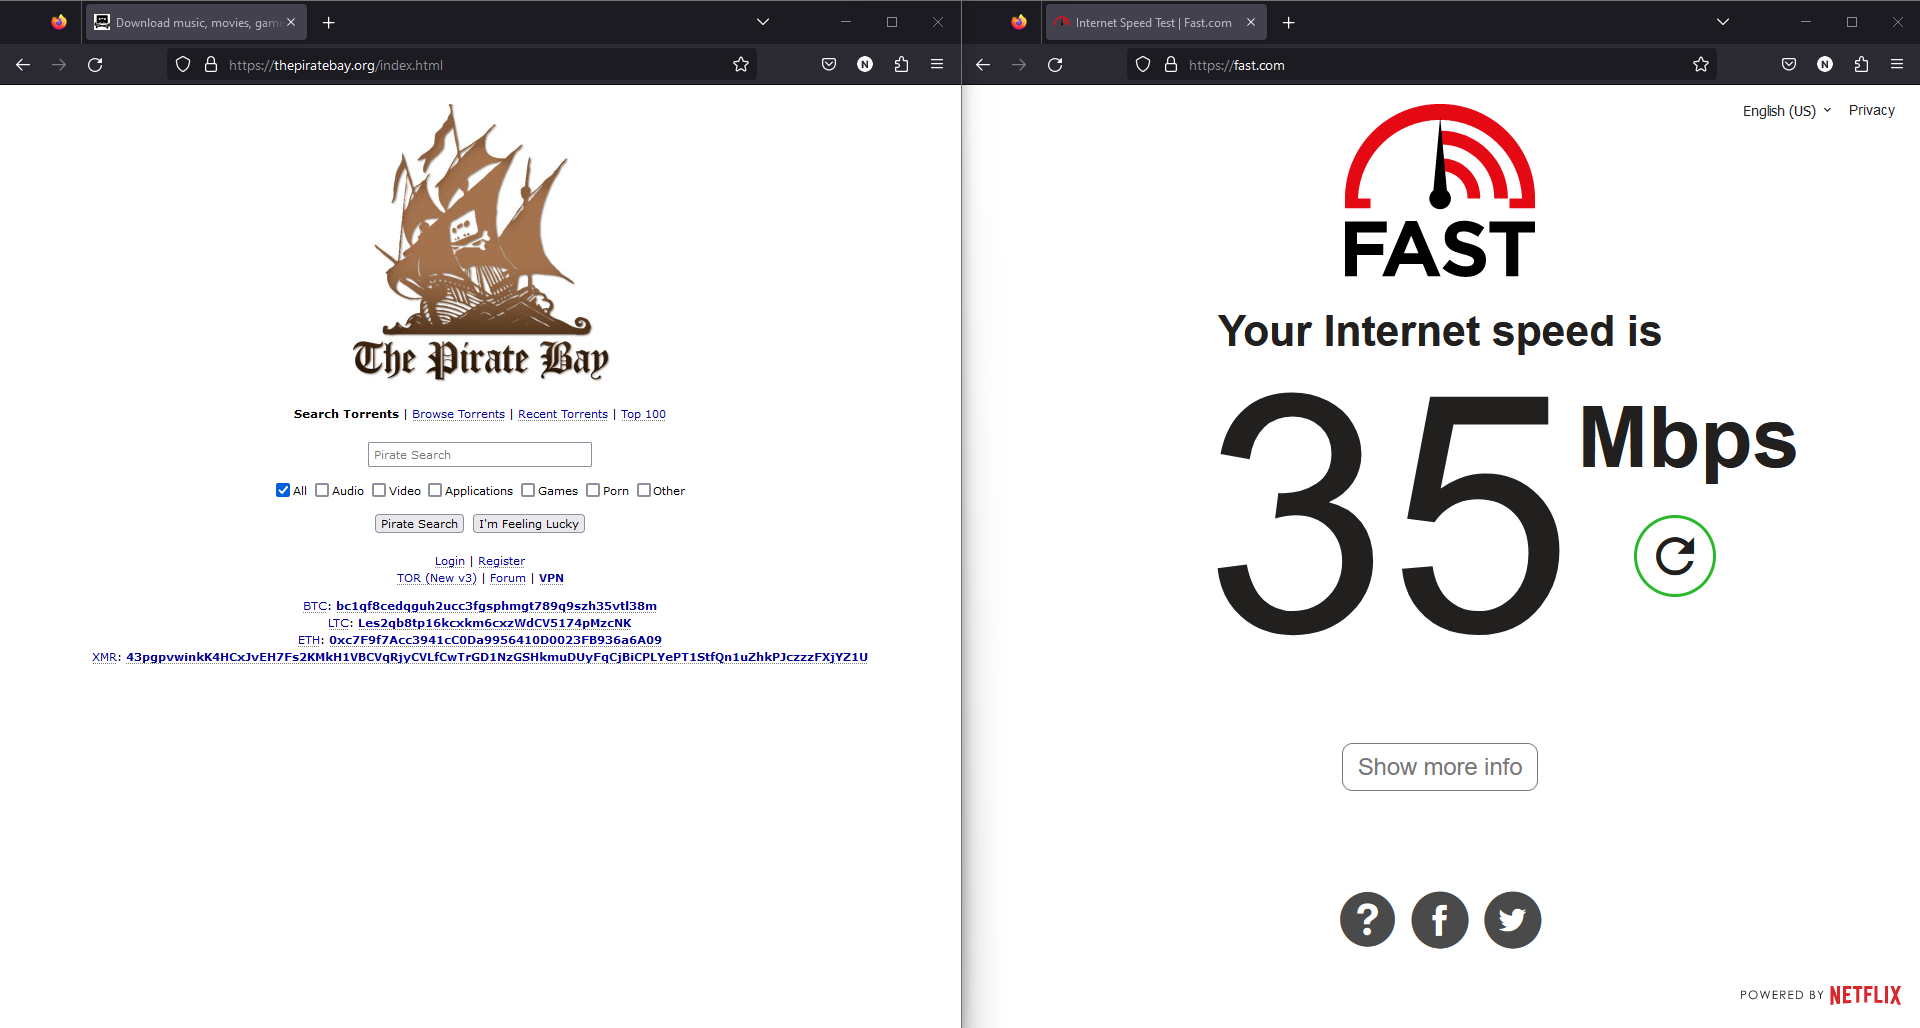
The internet speed will be a bit slower but much faster than other Free VPN alternatives.
Conclusion Link to heading
This blog post is for Firefox, as it is the only popular browser that allows us to use the SOCKS5 proxy. Google Chrome and Edge would require you to change your System’s Network settings which is not flexible. Also, Azure’s servers do not allow torrent downloads, so you can’t download torrents with this method. Installed applications and games, for example - Valorant, generally do not provide settings to select a proxy server, so the only option is a VPN.
Remember to stop the server if it is not in use.
Anyways, enjoy privacy and freedom. I’ll see you in the next one.